What It Does: A layer can be utilized for a picture, text, brush strokes, foundation tones, examples, and channels.
I like to consider layers sheets of glass stacked on top of each other that you'll use to make an end result. Each sheet can be changed independently without influencing the task overall, which can save you huge loads of time when making alterations to singular components of your reality.
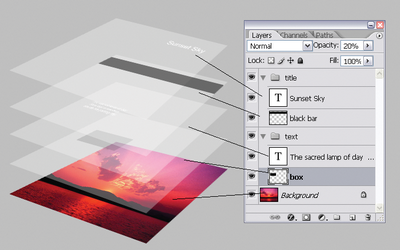
Layers are by a long shot the main component of Photoshop - and, as I would see it, they're one reason numerous individuals hurl their arms in disappointment. Be that as it may, when you see how they work, I guarantee they'll make your life a lot simpler.
Where It's Located:It has its own module on the base right-hand corner of your Photoshop screen, naturally. You can likewise get to it by clicking "Layer" in the top menu bar.
Genius Tip: Always name your layers. Keeping them coordinated will help keep you rational, particularly on the off chance that you end up chipping away at a task with countless layers.
To add or erase a layer:
From the top menu bar, pick Layer > New > Layer...
To choose a layer:
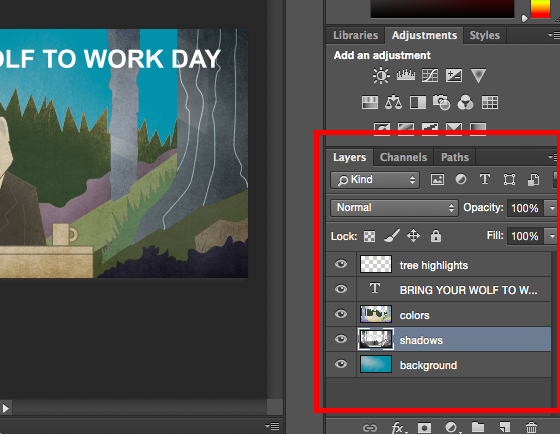
The chose layer is featured in blue. To alter a particular piece of your picture, you'll need to choose that particular layer.
You'll likewise see there's an "eye" image close to each layer: Click that image to kill the eye on and, subsequently flipping the perceivability of that layer as you work.
To copy a layer:
To begin with, select a layer or gathering in the Layers board. Then, either drag the layer or gathering to the Create a New Layer catch, or right-click the layer to pick "Copy Layer" or "Copy Group." Enter a name for the layer or gathering, and snap OK.
Professional Tip: You can do a wide range of cool things with layers - and in all honesty, making energized GIFs is one of them. Look at our bit by bit instructional exercise here.
To study adding, erasing, and copying layers in Photoshop, look at this video instructional exercise.
2. The Color and Swatches Tool
What It Does: The Color and Swatches instrument allows you to utilize, adjust, duplicate, and save custom tones for your substance. While this may appear to be a lovely plain as day component, it really has incredible highlights that will keep your visual substance dynamic and bind together your shading plans.
Where It's Located: It has its own module on the upper right-hand corner of your Photoshop screen, naturally
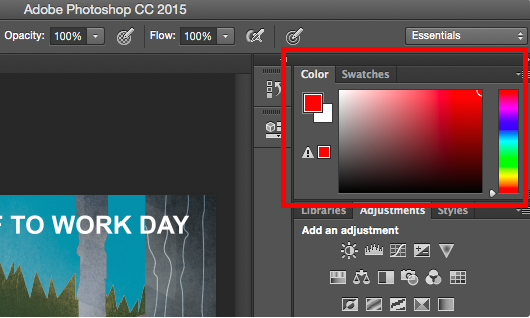
Somewhere else to discover the Color device is at the lower part of the toolbar on the left, demonstrated by two covering boxes:

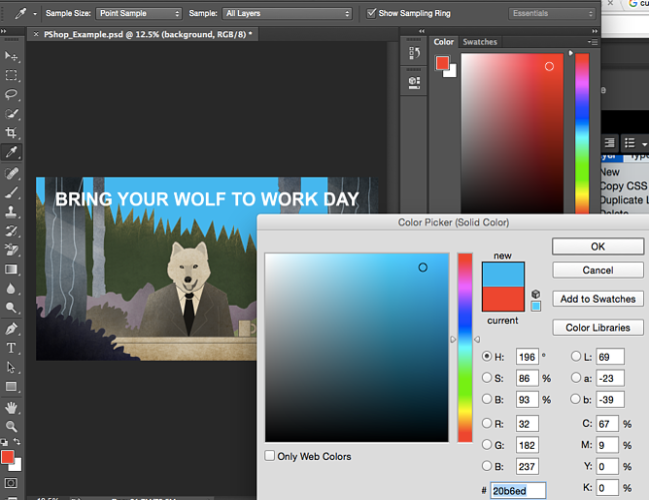
To make your own custom tone:
Open the Color Picker by double tapping on the top box either in the Color module, or in that menu on the left.
From that point, you'll see an upward range of shading with a slider on it, which you can conform to make your own custom tone. Then again, in the event that you as of now have a particular shade of which you know the hex worth (for example #1fb1ee), at that point enter it in the suitable box to find that tone naturally. You can likewise choose your shading pattern dependent on RGB or CMYK esteems.

Any shadings you make can be added to your "Patterns" in the event that you click "Add To Swatches."
Professional Tip: Take your organization tones and save them as "Patterns" with the goal that you can reference and reuse them at whatever point you're planning your visual substance.
3. Custom Fonts and The Text Tool
What It Does: The Text instrument allows you to add custom text styles to your information base, and it gives you admittance to cutting edge text style settings that give your content some genuine style.
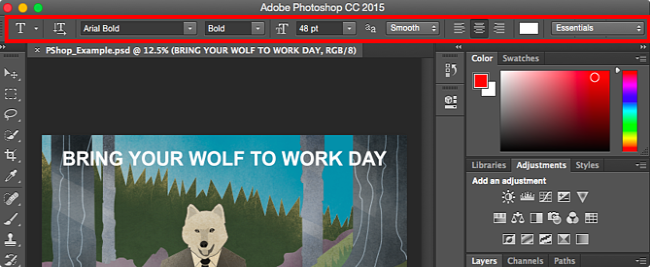
Where It's Located: The toolbar to your left side, close to the base

When you click the Text apparatus symbol, the entirety of the settings and textual style choices will spring up at the highest point of your screen. These settings let you change the text style, text dimension, and dividing between characters, stature, width, shading, and style. Make certain to choose the layer of your ideal content to alter it.
To add text to your realistic:
The content device works like some other content apparatus you've utilized. Snap the "T" symbol on the left side bar, drag the content box over a specific territory you need text to show up, and you're set to go.
At whatever point you make a book box, Photoshop will produce a layer for it. You can pick the shading, size, stroke, textual style, and an assortment of different choices to change everything around.

4. Custom Brushes and The Brush Tool
What It Does: Just similarly as with textual styles, you can add your own, eminence free, custom brush tips. With the brush settings, you can change the size, shape, and straightforwardness of your brush strokes to accomplish various diverse enhanced visualizations.
Brushes are an extraordinary method to add some visual accents to your substance. Photoshop gets you going with a pleasant determination of brush tips that you can use to tidy up your designs and make some fundamental enhanced visualizations.
Where It's Located: The toolbar on the left
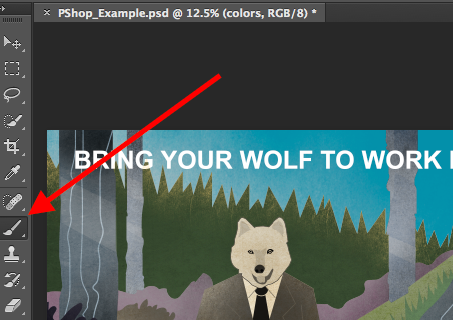
When you click the Brush instrument symbol, the entirety of the settings and brush alternatives will spring up at the highest point of your screen. These settings let you change the brush size, haziness, stream, etc. You'll discover an assortment of pre-introduced brush tips, just as any custom brush tips you introduce to Photoshop.

To utilize the brush apparatus:
The brush apparatus is ideal for adding configuration accents to your substance content. When utilizing the brush apparatus, I generally recommend adding another layer to work with so you don't cover up any of your different components. You can pick tones from your library of patterns, or utilize a custom tone.
Changing the brush settings can give your brush a definitely unique look and style. Try not to be hesitant to play around a piece with the entirety of your custom brushes.
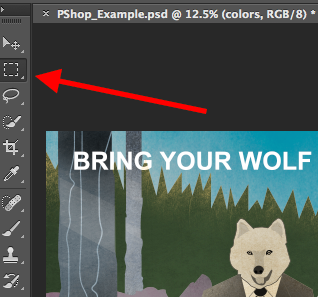
5. The Select Tool
What It Is: When utilized accurately, this instrument will allow you to choose singular components, whole illustrations, and figures out what is replicated, cut, and glued into your designs.
Where It's Located: The toolbar on the left.
6. The Fill Tool
What It Does: The Fill instrument, in the past the Paint Bucket apparatus, fills any strong region with your preferred shade. It's extraordinary for strong foundations or shading enormous regions. It can likewise be utilized to apply examples to your pictures. The Gradient apparatus inside the Fill device allows you to make a decent, blurred foundation impact of your preferred shade.
Where It's Located: On the top menu bar, pick Layer > New Fill Layer. From that point, you have the alternative to pick "Strong Color," "Angle," or "Example."

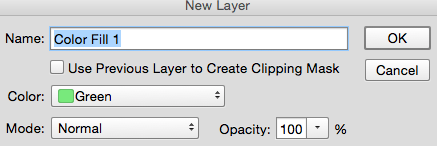
To fill a strong region with a shading:
In the first place, select the layer you'd prefer to load up with a strong shading. At that point, from the top menu bar, pick Layer > New Fill Layer > Solid Color... From that point, "Another Layer" window will spring up and brief you to name the new shading fill layer. Try not to stress over picking the shading you need at that moment - basically name the layer and press "Alright."
Then, the Color Picker window will spring up. Here, you can pick which strong shading you'd prefer to fill. Since I'd chosen my experience layer to fill in (for example the shade of the sky in my realistic), the shading I select in the Color Picker directs the shade of the sky:
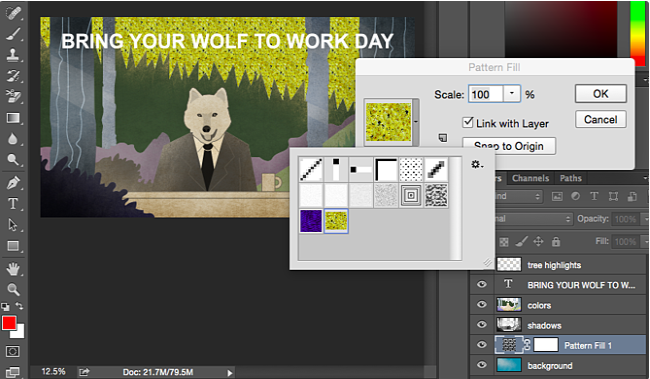
To apply examples to your pictures:
These examples can be physically made in the event that you have the opportunity and persistence, or you can discover an assortment of sovereignty free examples accessible for download through an essential Google search.
To apply an example, first select the layer you'd prefer to load up with an example. At that point, from the top menu bar, pick Layer > New Fill Layer > Pattern... From that point, "Another Layer" window will spring up and brief you to name the new shading fill layer. Try not to stress over picking the shading you need at that moment - essentially name the layer and press "Alright."
Then, you'll see the "Example Fill" window spring up. From that point, you can pick the example and its scale. Since I'd chosen my experience layer to fill in (for example the shade of the sky in my realistic), the example I select in the Pattern Fill changes the sky:
 Reviewed by Mubeen Sarfraz
on
June 12, 2021
Rating:
Reviewed by Mubeen Sarfraz
on
June 12, 2021
Rating:
No comments: